Install Floating Shelves: Easy Drywall Guide 2026
Installing floating shelves on drywall involves locating studs, using appropriate anchors, and carefully leveling the shelves.
Floating shelves are a great way to add storage and style to any room. However, installing them on drywall can be a bit tricky without the right guidance. This article will walk you through the process, offering professional insights and practical tips to ensure your shelves are secure and stylish. Whether you’re a DIY enthusiast or a beginner, you’ll find valuable information here to achieve a flawless installation.
Tools and Materials Needed
Before you start, gather these essential tools and materials:
- Stud finder
- Level
- Drill with bits
- Tape measure
- Pencil
- Wall anchors or toggle bolts
- Screws
- Screwdriver
- Floating shelf kit
Having these on hand will streamline the process and reduce frustration.
Step-by-Step Guide to Installing Floating Shelves
1. Locate the Studs
- Use a stud finder to identify studs within the wall.
- Mark the locations with a pencil.
Finding a stud ensures your shelf has the strongest support possible, preventing future issues.
2. Measure and Mark
- Decide the height and placement of your shelves.
- Use a level to draw straight lines where the shelves will be installed, ensuring accuracy.
This step allows you to visualize and adjust the placement before drilling.
3. Drill Pilot Holes
- Drill holes into the marked stud locations.
- If studs aren’t available, drill into the drywall using the appropriate anchors.
Pilot holes help prevent the drywall from cracking and ensure a snug fit for your bolts or screws.
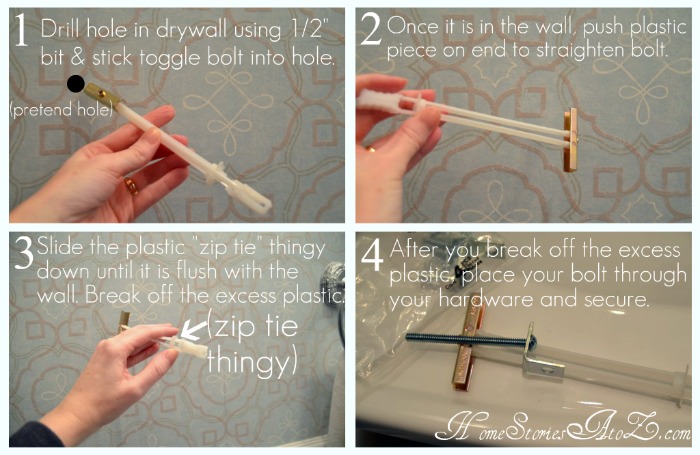
4. Insert Wall Anchors
- If using drywall anchors, insert them into the drilled holes.
- Ensure they are flush with the wall surface.
Choosing the right anchor type for your shelves’ weight is crucial for stability.
5. Attach the Brackets
- Align the brackets with the drilled holes.
- Secure them using screws and a screwdriver.
Tighten each screw firmly to ensure the shelf will not wobble or fall.
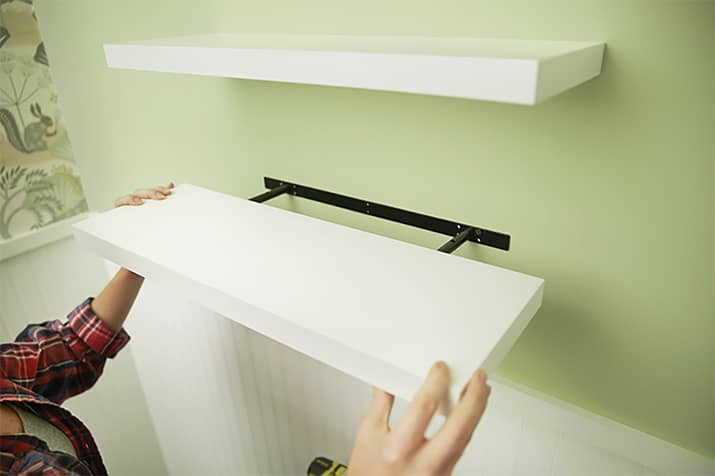
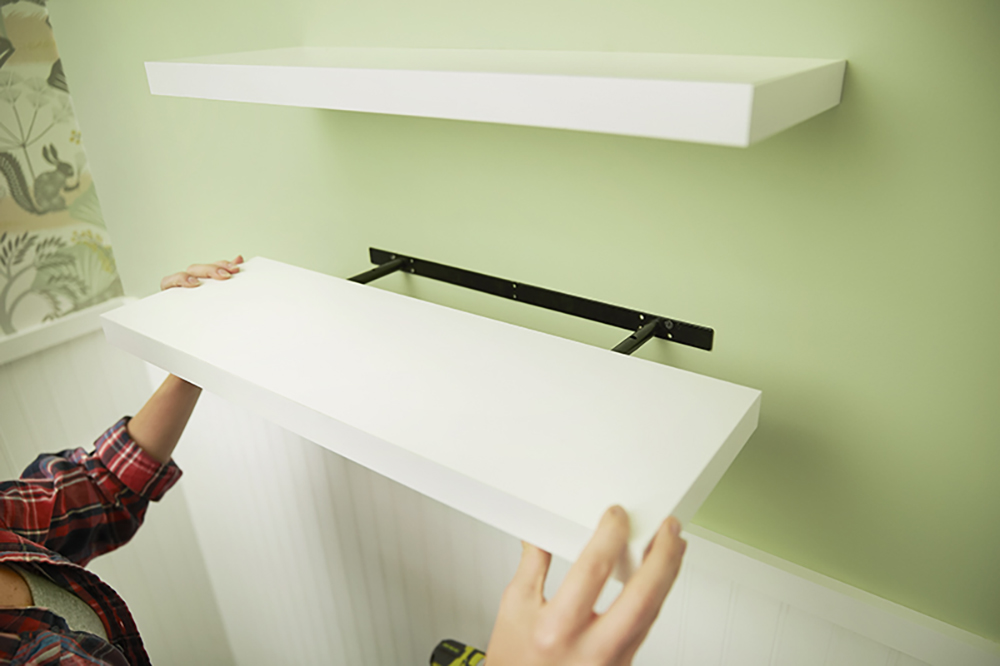
6. Mount the Shelf
- Slide the shelf onto the brackets.
- Ensure it sits securely and level.
Test the stability by applying gentle pressure—if it wobbles, recheck alignment and tightening.
Common Mistakes to Avoid
- Not using a stud finder: Relying on guesswork can lead to weakly supported shelves.
- Skipping pilot holes: This can damage drywall and compromise shelf support.
- Using incorrect anchors: Ensure the anchor type matches the shelf's weight capacity.
Learning from others' mistakes helps ensure your installation is successful and durable.
Maintenance Tips
- Regularly check screws and anchors to ensure they remain tight.
- Avoid overloading shelves beyond their weight capacity.
Proper care extends the lifespan and safety of your shelves.
Frequently Asked Questions of How to Install Floating Shelves on Drywall
How do I find studs in drywall?
Using a stud finder is the most reliable method. Move it across the wall slowly to detect stud locations, which you can then mark for drilling.
What if there are no studs where I want my shelves?
Use heavy-duty drywall anchors or toggle bolts for support. These provide sufficient strength when studs are unavailable.
How much weight can floating shelves hold?
This depends on the type of anchors and materials used. Always refer to the shelf’s manual for weight limits and ensure proper installation.
Can I install floating shelves on plaster walls?
Yes, but you may need specialized anchors designed for plaster. Always drill carefully to avoid damaging the plaster.
Why are my shelves sagging?
This could be due to overloaded weight or loose screws. Ensure anchors are secure and avoid exceeding weight limits.
Conclusion
Installing floating shelves on drywall doesn’t have to be a daunting task. With the right tools, careful planning, and attention to detail, you can create a stunning display in any room. Remember, secure installation is key to both functionality and aesthetics. Ready to transform your space? Grab your tools and start with confidence! For more home improvement tips, consider subscribing to our newsletter or leaving a comment with your experiences.